
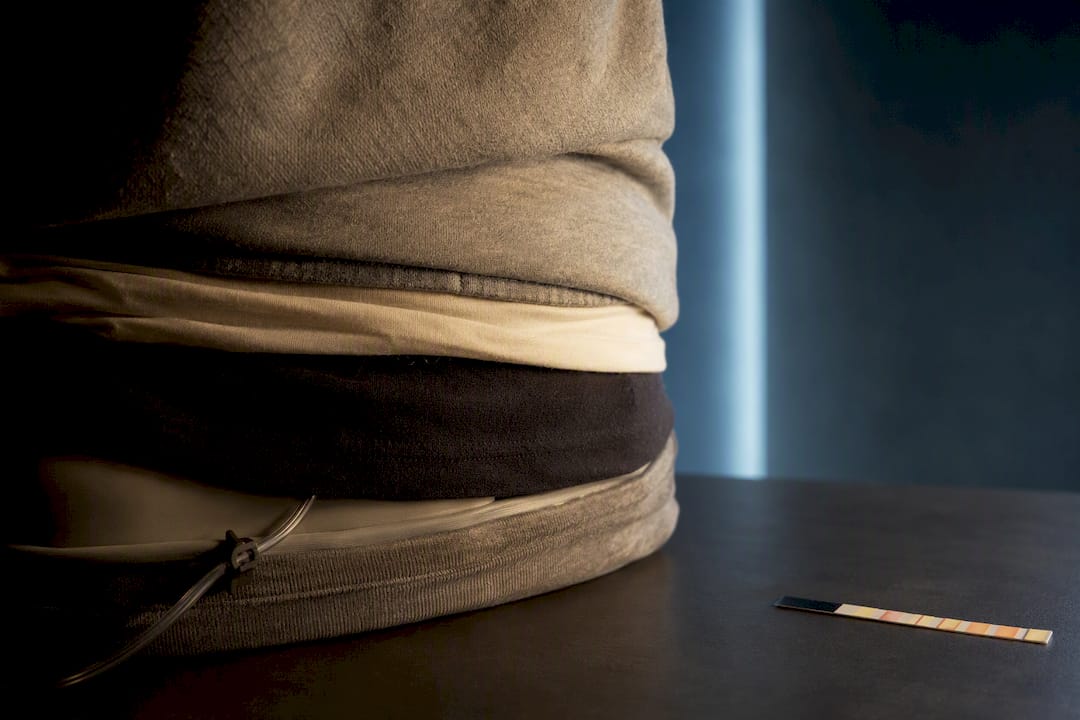

A synthetic urine belt can work in some lightly supervised collection settings, but only if the sample reads between 90–100°F when it’s handed over. That single number is the deciding factor. Every other step, from mixing to concealment, exists to protect that temperature window, so your first move should be a full dry run at home with the actual kit before test day arrives.
TL;DR:
- Maintaining a synthetic urine temperature between 90 and 100°F is crucial, as labs reject samples outside this range without further testing.
- Fully preparing and practicing the belt setup, including heating, mixing, and flow control, significantly reduces the risk of failure during collection.
- Using manufacturer-calibrated heat pads and verifying temperature with a strip or digital probe offers the most reliable warming method, especially in cold environments.
- Proper clothing layering and belt placement are essential for concealment, but direct observation makes using a belt highly risky and not recommended.
- Selecting a high-quality, lab-tested kit with clear instructions, an intact temperature strip, and proper mixing procedures increases the chances of passing the test.
Table of Contents
- Synthetic Urine Belt How To: Step-by-Step Setup
- How Do You Heat and Store the Sample Correctly?
- Where and How Should You Wear the Belt for Concealment?
- What Are the Most Common Mistakes to Avoid?
- What Should You Check Before Buying a Kit?
- Is a Belt Really Your Best Bet, or Are You Overcomplicating This?
- Get the Sample Right Before You Worry About the Belt
- Sources
Synthetic Urine Belt How To: Step-by-Step Setup
Getting a synthetic urine belt ready isn’t complicated, but it’s sequential. Skip a step or rush the timing, and you’ve built in a failure point before you ever leave the house. Here’s the order that actually holds up under pressure.
- Unpack and inspect everything. Open the kit the moment it arrives, not the morning of your test. Check the expiration date printed on the bottle or powder pouch, confirm the temperature strip is intact, and make sure the belt, tubing, and clamp show no cracks or worn seams.
- Prepare the sample. If you’re working with a powder formula, mix it with distilled water at the exact ratio the manufacturer lists, then shake it for at least two minutes so nothing settles unevenly. If you’re using a premixed liquid, hold it up to light and check for a pale yellow color with no floating particles. Cloudy or gritty liquid is one of the fastest ways to draw a second look from collection staff.
- Load the belt. Pour the sample into the bladder, seal it, and check for leaks around the seams before you attach the tubing.
- Activate the heat source. Snap or apply the heat pads and give them time to reach a stable temperature range before you rely on them.
- Verify with the strip. Press the temperature strip against the bladder wall, close to skin contact, and read it after a few minutes of settling time.
- Wear it under your clothes. Position the belt at the waist or thigh, whichever the kit recommends, and route the tubing so it reaches your access point without pulling or kinking.
- Do a dry run. Practice reaching for the clamp, releasing it, and controlling flow speed with your clothing on, in front of a mirror if possible.
- Recheck temperature at the collection site. Right before you’re handed a cup, glance at the strip one more time.
- Dispense smoothly. Unclamp, pour to the required volume, and reclamp immediately to avoid drips.
- Clean up afterward. Dispose of the empty bladder and tubing away from the testing facility, and check your clothing for any residue or odor before you leave.
That sequence matches what most hands-on walk-throughs recommend, including
that consistently emphasize pad activation, strip verification, and a secure, rehearsed dispensing motion, in that order.
A few things trip people up more than anything else on this list:
- Mixing powder with anything other than distilled water, which can leave mineral residue or an off color.
- Forgetting to check the expiration date because the kit sat in a drawer for months.
- Skipping the dry run and fumbling the clamp release in front of staff.
- Using a strip that’s been bent or creased, which can give an inaccurate reading.
Pro Tip: Do your full dry run at the same time of day as your actual appointment. Room temperature, your clothing layers, and even your own body heat shift throughout the day, and a belt that reads perfectly at noon in shorts can behave differently at 8 a.m. under a winter coat.
How Do You Heat and Store the Sample Correctly?
Labs don’t guess about temperature. They reject urine samples outside the 90–100°F range almost immediately, often without further testing. That range exists because real human urine leaves the body at close to internal body temperature and cools only slightly by the time it’s collected. A sample that’s too cold or too hot signals substitution before a single chemical test even runs.
Manufacturer heat pads are the most reliable warming method, and for good reason: they’re calibrated to a predictable curve rather than the guesswork of body heat alone. A detailed breakdown of heat pad timing shows most pads need somewhere between 15 and 60 minutes to reach a steady temperature, depending on room conditions, sometimes closer to the 30 to 50 minute mark in cooler environments.
What to avoid entirely:
- Microwaving the sample, which heats unevenly and can overshoot the safe range in seconds.
- Spot-heating with a lighter or hair dryer, which creates hot pockets that read fine on one side of the strip and fail on the other.
- Relying on body heat alone in cold weather, since it often can’t compensate fast enough.
Bring a spare heat pad if your appointment could run long or if you’re waiting in a cold lobby. A strip reading is convenient, but a quick digital probe check, when you have the extra minute, tends to give a more precise number than a color strip alone.
Storage matters just as much as heating. An unopened kit typically has a much longer shelf life than a sample once it’s been mixed or exposed to air, and shelf life guidance is worth checking against your specific product before you assume it’s still good. Some vendor instructions allow reheating the same day if the seal was never broken, but reheating methods vary in risk, and repeated heat cycles can degrade the sample’s composition. Refrigeration slows degradation but adds its own warm-up time before use, so plan that extra step into your schedule.
Where and How Should You Wear the Belt for Concealment?
A belt only works if it disappears under your clothes and operates without a sound. That means thinking about layering, placement, and rehearsal as three separate problems, not one.
Loose, mid-weight clothing works better than anything tight or thin. Jeans or looser slacks with a slightly untucked shirt give you room for the bladder and tubing without printing an outline. Avoid clingy fabrics that reveal edges, and skip anything overly baggy that looks out of place for the setting you’re walking into.
Placement depends on the kit design, but most belts sit at the waist or upper thigh, with tubing routed down the inside of the leg to a discreet access point. Route the tubing so it has no sharp bends, since kinks are one of the most common reasons flow stops or sputters mid-pour. Wearable belts are essentially gravity-fed bladders with tubing and a clamp, so gravity and a clean tube path do most of the work for you.
Before test day, run through these drills at home:
- Reach for the clamp release with your clothes on, seated and standing.
- Practice releasing flow quietly, checking that it doesn’t sputter or run too fast.
- Walk, sit, and bend at the waist to confirm nothing shifts or becomes visible.
Pro Tip: Fumbling at the handoff is what draws attention, not the belt itself. Rehearse the release motion until your hand finds the clamp without looking down.
If your test involves direct observation, none of this applies. A belt cannot be used undetected when staff watches the collection directly, and attempting it under those conditions carries far more risk than any low-tech shortcut. Some online communities suggest compression shorts or rubber bands as makeshift alternatives, but those methods are considerably less reliable than a purpose-built belt with proper tubing and a clamp.
What Are the Most Common Mistakes to Avoid?
Temperature failure causes more rejected samples than anything else. It’s consistently flagged as the single biggest reason synthetic urine attempts fail at the point of collection. Beyond temperature, watch for:
- Visible particles or cloudiness from improper mixing.
- Sputtering or uneven flow from a kinked or pinched tube.
- Leaks around the bladder seal that soak through clothing.
- Expired product that’s been sitting since a previous test date.
Quick fixes exist for most of these. Rewarm against your own body if the strip reads low, swap in a spare pad if one fails, and check the tubing for kinks before you clamp it shut. Recheck the strip one last time right before handoff, since temperature can drift even a few minutes after you last checked it.
There’s a legal side to this too, and it deserves a straight answer. Several states criminalize possession of synthetic urine specifically for the purpose of defeating a drug test, and many testing facilities bar substitution outright under their own policy, separate from any state law. If your test involves direct observation or falls under DOT or safety-sensitive screening rules, substitution isn’t a realistic option, and attempting it invites consequences far beyond a failed test.
What Should You Check Before Buying a Kit?
Not every synthetic urine product is built the same way, and the difference shows up fastest under lab scrutiny. The Ultra Pure Synthetic Urine Kit from PassDrugTest.net is designed around the same principle this whole guide leans on: a sample that matches real human urine closely enough in color, composition, and warming behavior to pass a visual and temperature check.
Before you leave home, verify:
- The kit includes a temperature strip and heating element, not just the sample container.
- The bottle or pouch has a clear expiration date you can read without guessing.
- Mixing instructions, if it’s a powder formula, are specific about water type and ratio.
- The color matches a pale yellow tone with no visible sediment once prepared.
Manufacturer guidance on the product page reinforces the same warming and mixing steps covered above, because those steps are what separate a sample that passes from one that gets flagged in the first thirty seconds. If you’re comparing formulas or want a broader look at what to check before buying clean urine products, that kind of pre-purchase research matters as much as anything you do on test day.
A synthetic urine belt is only as good as the sample inside it. Get the temperature and the mix right, and the mechanics of wearing it become the easy part.
Is a Belt Really Your Best Bet, or Are You Overcomplicating This?
The conventional advice on synthetic urine belts spends too much time on gadgets and not nearly enough on rehearsal. Every failure story that circulates online traces back to the same root cause: someone trusted the equipment without testing it under real conditions first. A heat pad that worked in a warm bedroom can behave differently in a cold clinic waiting room, and a strip you never practiced reading becomes useless the moment your hands are shaking.
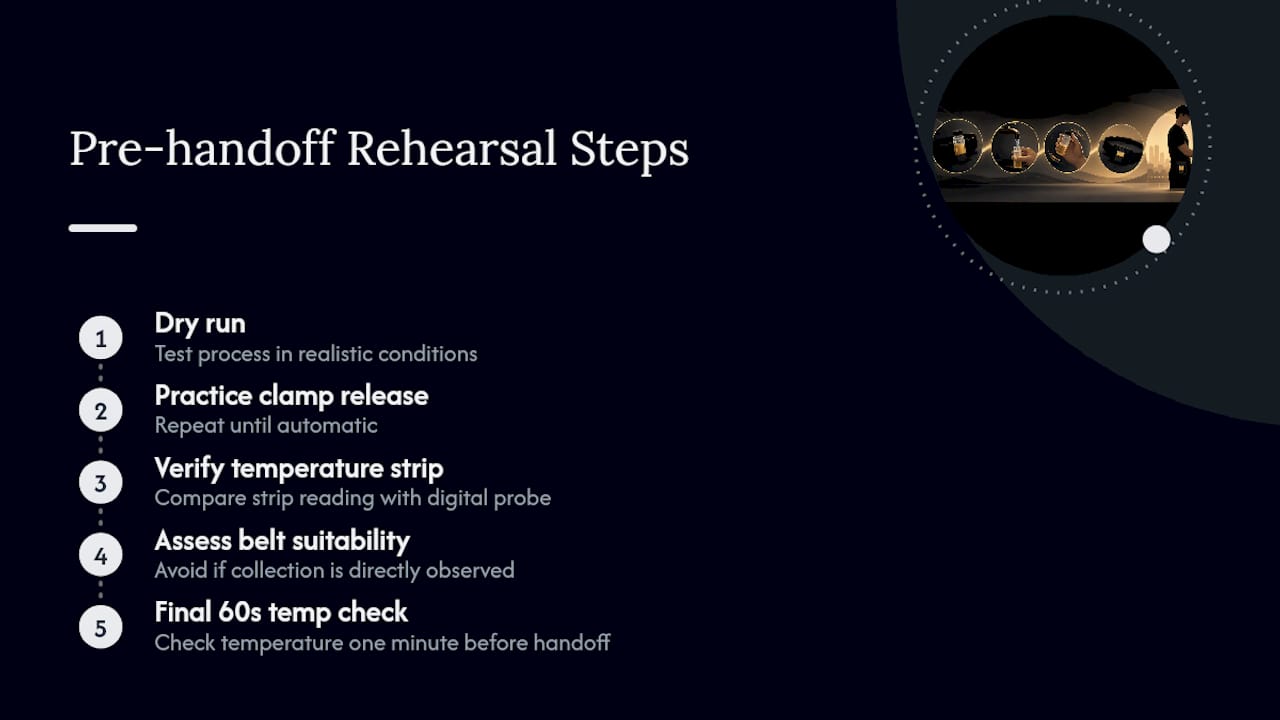
What actually matters, based on everything the temperature data and vendor guidance point to, is treating the dry run as non-negotiable, not optional. Practice the clamp release until it’s boring. Check your strip against a digital probe once so you know how much to trust it. And be honest about whether your testing scenario even allows for a belt at all, because no amount of preparation helps in a directly observed collection.
If there’s one thing worth prioritizing above concealment, clothing choice, or even the kit itself, it’s the temperature check you do sixty seconds before handoff. Everything else is preparation for that one moment.
— MIchael
Get the Sample Right Before You Worry About the Belt
Certain synthetic urine kits aim to provide samples that read true to lab temperature standards and mix clean, to reduce guesswork in DIY attempts. Where generic kits leave you troubleshooting color, odor, or heat retention on the fly, this one comes with the components and instructions built for the rehearsal-first approach that actually holds up under scrutiny.
If you’re weighing your options for an upcoming test, start by browsing the drug test detox products collection to compare kits side by side, or head straight to the Ultra Pure Synthetic Urine Kit to check current stock and shipping times before your test date gets closer than you’d like.
Sources
- Clinical and forensic aspects of urine drug testing (PMC)
- How to Use Synthetic Urine the Right Way: Avoid Common Mistakes
- Incognito Belt Review and Comparison: Myths, Facts, How‑To